In this tennis class, Javi teaches how to properly hold the racket for the one-handed backhand and what the right grip is for a beginner player. He also teaches the student how to technically execute the basic swing of this stroke in three simple steps. In the end, we will see how to generate some topspin and how to correctly follow through.
For a beginner player, the one-handed backhand is not easy to learn because not only are we hitting the ball on our non-dominant side but also we are using arm muscles that are naturally not very developed, such as the triceps. Therefore, when we start to learn this stroke from scratch we must have a lot of patience and go step by step.
One-handed backhand grip
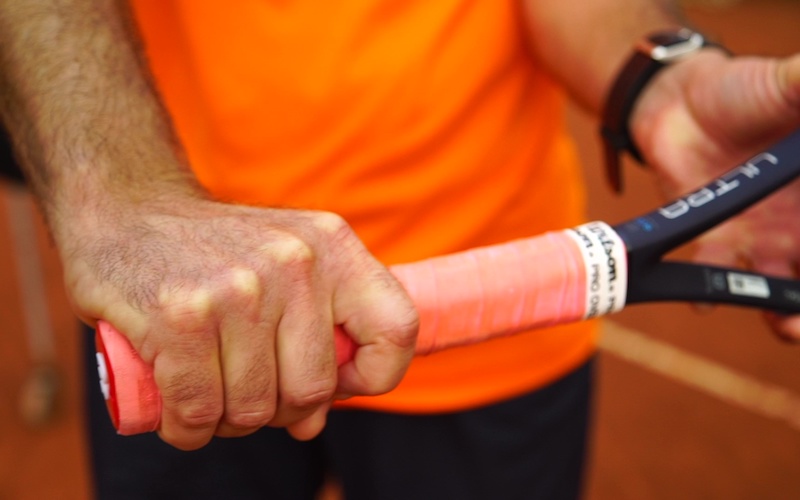
The grip for the one-handed backhand is eastern backhand grip, which is very similar to how we would grip the handlebar of a bicycle. Basically, we have to place the index finger’s knuckle on the first bevel of the grip, which is the top side if we put the racket perpendicular to the ground. This grip allows to play both flat and with topspin.

We will be explaining the details of this grip in future tennis lessons for beginner players.
Learn backswing in three stages
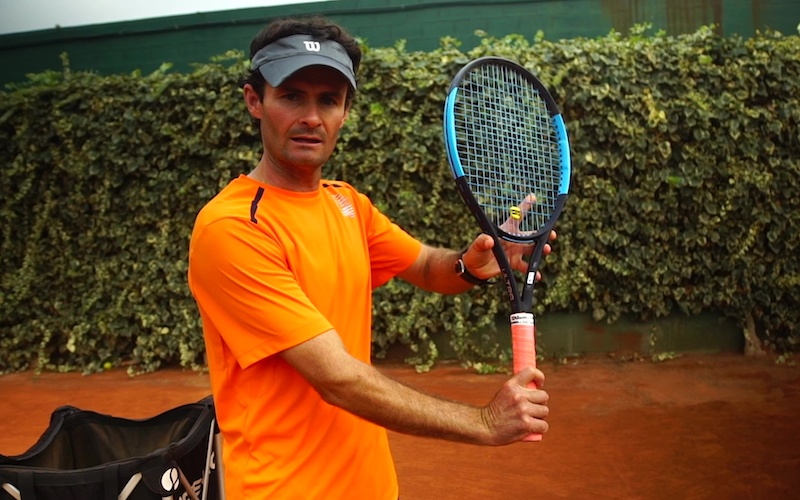
Javi demonstrates three simple stages of how to learn to do the backswing: preparing the racket backwards horizontally, diagonally and finally upright.
In order to be able to do the backswing with the racket in an upright position, first, we should grab it with our non-dominant hand at the highest point of its throat and then bend and raise the non-dominant elbow. In this way we can advance towards the ball rounding the racket below the ball and thus generating a bit of topspin.

Horizontal
- the racket is perpendicular to the ground in horizontal position
- the elbow should be kept close to the body
- the player will hit a flat shot and as if she was pushing the ball
Diagonal
- we lift the racket a little bit to the diagonal position
- the player continues hitting flat without much wrist movement
- at this stage we still finish the motion with the racket in front
Upright
- the player is placing the racket in an upright position
- the non-dominant hand is holding the racket by its throat
- the non-dominant elbow is lifted and bent at the back
Start adding spin to the ball
At this stage we are swinging forward in the circular motion and also turning the wrist at the end to finish with the racket upright instead of horizontally. Consequently, the student will finish the movement with the elbow stretched and raised to shoulder height. The back foot should be twisted by lifting the heel to facilitate the turning of the upper body. We can see the opening of the chest with the arms spread in the opposite directions.
Key takeaways
The main learning points from this tennis lesson for beginners are:
- Use the eastern backhand grip and hold with the fingers close to each other.
- Prepare the racket backwards in upright position.
- Swing forward towards the ball in circular motion of the racket and underneath the ball.
- After the impact turn your wrist so that the racket head is pointing up.
- To follow through extend the elbow of your dominant arm, lift the back heel and stretch your non-dominant arm out behind your body.
Beginner players should use eastern grip and prepare the racket upright!
In this video, Javi explains how to hold the racket with the correct grip for one-handed backhand. He also shows three exercises to teach the player how to technically execute the basic swing of this stroke in simple steps. In the end, he demonstrates two additional exercises to start generating some topspin.
Exercise 1
Hold the racket horizontally during the preparation phase
2 sets of 15 balls
Exercise 2
Hold the racket diagonally during the preparation phase
2 sets of 15 balls
Exercise 3
Hold the racket upright during the preparation phase
3 sets of 15 balls
Exercise 4
Add spin by finishing with the racket pointing up
3 sets of 15 balls
Exercise 5
Finish with the elbow straight and at shoulder-level
3 sets of 15 balls
